More Handmade Alphabets


Detail of printed text on textile using inkjet printer

Here are just a few links and cool sites that have some interesting ideas for handmadealphabets of different kinds (not just stamps). Since I'm teaching a lesson this week on Joggles that talks about my usual technique with tips and to-dos (using craft foam, like lots of others) to make alphabet stamps, I took a tour around the blogosphere and found these interesting sites. 

Crafting a Green World -- not stamps, but crafts, still fun...

Wooden Alphabet Beads -- how about these mounted to make stamps?

 Jumbo foam letters can be purchased here if you don't want to cut your own.

Really GOOD Alphabet Stencils

A template for cutting your own letters, in case you want something a little more regular than your own text. And more here.

Here is a great tutorial for making CORK alphabet stamps.

Linoleum Block stamp basics are here on this page.

And to go with them all: Dollar Store Stamp Pads!

And last of all, if you want a "real" inkable rubbler stamp (better for paper than for fabric) you can custom design online on several sites including this one.

I also set up a Pinterest Board devoted to More Text on Textiles! 

Any other ideas? Feel free to share -- and by the way, the Joggles workshop runs this and three more weeks, (and you can download last week's lesson any time) so if you are interested, sign up here.

Screen Printing Free Form Letters

This blog post is intended as a bonus for those enrolled in my More Text on Textiles online course that started on Joggles today. 

Now, it's not too late to join in the fun, so if you are interested in this 4-week, PDF based course (with an online forum during the next 6 weeks), head on over to this link for enrollment info --http://www.joggles.com/store/catalog/product_info.php?cPath=75_1235&products_id=24165

It's an affordable way to get your feet wet with putting words, quotations, pithy comments and other thoughts (yours and others) on your art quilts, art cloth, wearable art or mixed media pieces.

Using letter forms for screenprinting stencils is another way to use your cut letters. P.S. This post assumes you have a basic knowlege of screenprinting. If not, go to this site to see a demo at http://www.youtube.com/watch?v=wogKeYH2wEE. This is a demo that takes you through the entire process, making your own screen. You can purchase them ready-made at many art supply stores. This demo shows all kinds of stencils, and you will be using your cut letters as the stencil. YOU don't need a clamped frame, I just move my small screen over the fabric. 

Because these letters will be used as a one time stencil, then thrown away, I usually just use old newspaper or sheets of newsprint, or recycled copy paper. Newspaper is really great because it is really thin and adheres to the screen and wet ink really well.


Any thin flat paper will work, but if you want a reusable stencil, cut your letters with contact paper (backing side up, the sticky side goes against the back of the screen).

 You can use any clean silkscreen for your tool. Occasionally I even use one with defects or blocked areas, for a distressed kind of print.

 Free-hand cut your word or words from your choice of paper (instructions are in the first lesson of More Text on Textiles). Then use small folds of masking tape (one or two per letter only), and tape your letters on the back (bottom) of the screen. Your words should read correctly through the screen unless you are intentionally reversing them. This is a great time to teach yourself to cut serif letters or letters that enlarge some iconic type (like those used by Corita Kent in her work).

Screenprint onto ironed flat fabric with thickened dye (see the Dharma catalog for easy instructions and supplies), textile screen printing ink, or other inks. Use a padded surface under your fabric.

Use your word as a repeat, or as a one-time print. When finished wipe down the screen, remove the letters and wash. Let textile ink prints dry, then iron to set. Thickened dye prints need to be batched, as with any dye painted fabrics.


TEXT Projected, Jenny Holzer

San Diego, Projection, Jenny Holzer LAST NIGHT: I  watched on Netflix an interesting documentary about conceptual text artist Jenny Holzer “About Jenny Holzer; Protect me from what I want”. She works (ed) with “truisms,” short statements from various perspectives that she may or may not personally agree with, but that are concise restatements of what she thinks is “in the air” in our Western culture. More about Jenny here.

Here use of text, messages and meaning is striking and ephermeral, the material is often projected LIGHT; her space, the architecture or natural environment. I highly reccommend the documentary.

Holzer's work made me open to looking for a "truism" in the text collages I had made recently as part of demos for teaching a Joggles on-line course. It was about finding a message that already existed in the text work that I had done, a kind of unconscious writing come to consciousness.

Here's the raw material: (text collages printed on fabric, erser stamps, paper cloth text collages, etc.)

And here's the process toward Art Quilt Complete:


I found: “Unseen messages never settle.” The cut letters are from fabric that was a direct print of a collage (now deconstructed into individual letters). a print of red “S”s from an eraser print and “NEVER SETTLE” from a paper cloth collage.


Traveling with Text

With my aquisition (thanks to birthday bonanza from Linda) of a NEW iPad with the camera, I am afire with digital imaginings. Here are some of my most recent experiments using several iPad apps one on top of another, as well as a few text-based Mixel collages.

The one above was a "physical" collage made with text cut from magazines (one of the exercises in my Text on Textiles courses, like that I am teaching on Joggles right -- and in the summer semester, too). I then photograhed it with the smart phone, sent it to the Cloud and my iPad and altered the colors with an app called PhotoPad (free, and a good photo editing tool). Then I drew on top of that saved image with some other tools and also erased part of the  image -- it looks to me like "Pollock takes on text."

Below is another physical collage that was altered, first with an iPad app called ArtistaHaikuHD that gives one a variety of watercolor effects/filters to use on photos.  Then I loaded that saved image into the PhotoPad App and played around with the colors. Que Cool!

Here's the watercolor versions in ArtistaHaikuHD:

How did I start? You can see the original here. 

 Or, rather the intermediate stage that was done on Mixel. The first product was actually this little 4 by 6 collage (shown here with two copies taped together):

WOW! It's amazing how these tools can morph one image SO MANY ways. I love to play with the possiblilities -- so the challenge is not in fluency, it's in when to quit and put my hands back on the wheel, so to speak. Where does what I can do only with hands happen?

Here's one way:

Print it with inkjet transfers on an old piece of tablelinen:


Susie Goes Live on Joggles


 It's here! This week I launch my first online (for real) course on Joggles, Text on Textiles.

I'll be teaching this on on the Joggles forum, and have been working on ways to provide meaningful help and feedback. I am considering adding some experimental videos (on the side, with links on the course materials) so this will be have a learning challenge and curve for me as well. The video's won't be part of lesson one, since it's less a technique than a getting-started design lesson, but I'll work on the videos for others of the 5 lessons. 

The workshop is only $45, so if you are interested, click over to the site and sign up now. The first of the lessons will be posted on Wednesday.


That link again: http://www.joggles.com/store/catalog/product_info.php?cPath=75_1235&products_id=23449


Designing with Text, Up in the Cloud

In a nutshell, it's Wordle. 

http://www.wordle.net/

The graphic above is the word cloud generated by Wordle using the text in this blog site! You can use any site, any text block, anything you want to type into the program or copy and paste. It's fun to scroll through the gallery, too. Lots of design uses for this program!

This is a great word cloud design site, passed along to me from Caryl Gaubatz via Pat Schulz, who knows my interest in text on the surface. I'm posting it here, not only to share, but I find that it's helpful to use my blog as a kind of electonic filing cabinet of ideas I want to explore more!

MORE: the developer of Wordle referred me (via his posterous page) to another, newer word cloud design generator -- http://www.tagxedo.com/app.html 

With Tagxedo, you can also put the cloud into a specific design shape or form and manipulate more of the criteria for the design. 

The BIg Freeze, and the Studio Thaw

Its COOOOLD outside. Guess that's the state of the union. We had rolling blackouts yesterday, but "they" seem to have figured out the grid for now. And, dispite dripping the tub, the water in the house is frozen, nothing to do but wait for the thaw (tomorrow it will be 43) and hope for the pipes' best. We've never had pipes freeze before so this is a major distraction and anxiety (i foresee torrents of water coming down from the attic). I am glad there is no El Cielo workshop going on! At any rate, send me pipe fairy prayers and, gee, while we are at it, if its going to be this dadburn cold can't we muster up a little snowfall tonight? Just a bit. Just to make the visuals complete.

However, while the freeze is going on its business, I have had some extended time in the studio (where the water still works). And that has been wonderful. It's a creative thaw I've been anticipating and hoping for. The place is still a mess from teaching supplies in and out, but instead of being my (yeah, right) regular neat and orderly person, I just cleared a workspace and dove in.

The piece I am working on is one that's been in my head for a long while, since working on collage examples for the Text on the Surface workshops. I discovered it when I took everything out for the Southwest School class this past Monday. There have been several calls for entries that I want to respond to, and at least one of them had to do with working outside of one's comfort zone (SAQA, I think) and another one has a theme that fits the collage perfectly. So rather than do my usual work-on-the-table improvisation, I actually made a paper pattern, am printing some of the elements, cutting others, and will have this big text based piece done by the end of the week I hope.

So, stepping out of my usual narrative, goddessy, archetypal themes, this one will be modernism, pure and simple (sort of). Its quite scary to spend time on something so different (though I have been ooching toward more formal, abstract work for a little while) but I suspect I have to do so this time in order to renew something important, to step beyond my own pictures of my own work, and to take a chance. That was the thaw I needed in order to get myself back to the design table in an authentic way.

So what about you? I'd love to know what risky business you are trying for your own creative thaw.

What I learned... (Text on the Surface)

Starting today (Monday afternoon), there's a five-week course at the Southwest School of Art -- Text on the Surface. If you're in SA and are interested, I think there is an opening for one more student.-

This was the course I attempted to design as an online course, only to discover that I am "not-so-good" at teaching online (as the kids say). Thanks to all the text test pilots who suffered through it! I suspect that I could get better, but I am not sure I want to until I can't get out there to teach in person any more.  I have a hard enough time with my interpersonal intelligence skills (or lack thereof) in person and trying to interact online in a teaching situation certainly pointed up my weaknesses. (I am the kind of person who can spend an entire evening with a feuding couple or two in the clutches of an extramarital affair and never notice anything.) The nuances of interacting online often evade me, whether it be via email or listserve. So while I have certain technical facility with it all, I seem to lack the ability to make the charisma leap -- or something!

Perhaps just putting out an e-book would work -- but I had a really hard time trying to interact, give feedback and provide guidance in an electronic "classroom." Fostering community online evaded me. And I suspect, as with realtime teaching, that that is what all of us want in an educational situation. 

Believing that its always better to work from one's strengths, I am sticking to the actual world for teaching and facilitating for now, So if you were waiting to hear about an online course, wait no longer. This working from one's strengths means that sometimes you do just make a u-turn. Find another way; back up and begin again.

It smarts. At 62, I, like a lot of people my age, don't really like being a beginner at anything. We prefer to stick with our success stories. We often do know what we like to do and how we like to do it. On one hand, that focuses our attention and keeps us from wasting the time on the planet we have left, but it can also lead to stagnation and boredom. So even though I am not continuing with the online adventure, I'm glad I tried it out and learned something new about myself.

Text on the Surface at SWSchool

Coming this spring to a school in SA:

 Intermediate/Advanced

2560 | Text on the Surface

Susie Monday

Learn to embed text messages into the surface of your art cloth or art quilts, with the form holding as much importance (and as much of the “message”) as any literary element. The words might disappear, remain legible, or become a surface texture; find ways to add letters and text with innovative materials. Some techniques to be explored include soy wax scrafitto, stitched paper cloth with word collages, direct printing on fabric with an inkjet printer, sun printing with letters and words using dye and paint, and making your own stamps and thermofaxes with words, collages and favorite quotations. The course includes handouts and other resources. A supply list will be posted on the SSA website.

Mon, Jan 31 – Feb 28 | 1:00 – 4:00P

Surface Design Studio | Navarro Campus

Tuition: $170 (Members: $155) | 5 weeks

Must See/Do/Listen Fun Stuff

I am easing back into blogdom with some fast-and-simple posts just to get myself back in the habit of posting. If you are looking for more substance I'm sure you'll find plenty of great sites  -- including the ones listed in this little mini-review of fun and games. These were all new to me, though none of the sites are exactly new. (BTW if you got one of those spamy invitations from me to join some kind of health site, believe me it IS a total spam-capture-email ploy that happened by stupidity. I am trying to get my name and info off the site, pronto.)

Here are the sites I've had reccommended to me over the past few days, all from good sources and all worth the follow-up when you have some scrolling around time.

GROOVESHARK -- http://listen.grooveshark.com/


Sort of like Pandora, one of my all time favorite ways to listen to music, Grooveshark is more direct in its choices. ie. You like Leonard Cohen, it finds all the music in its library by Leonard Cohen, covers of songs by Leonard Cohen, etc. and plays them for you in a live streaming playlist. (With Pandora, you put in an artist's or composer's name, you get music by many others that has similar sonic qualities to that artist's work.) With Grooveshark, you can save playlists, tag favorites, reorder the playlist, etc. Last night I painted the hallway listening to every know imaginable Beatles cover. It takes a lot more time than I was willing to give it to really get the interface, but that's ok. You can start listening to favorites immediately and without fuss. You can get an ad-free VIP version for $3.00 a month/$30 a year (also that includes a mobile ap for free for the time being, anyhow.)

TYPEDRAWING

An absolutely fun and wonderful addition to your computer design tools. It's easier to see than to describe, so jump on over to TYPEDRAWING and have some fun. You can upload to their gallery, email the results to yourself and then print, or, do as I did here and make a clipping.

BLOCKPOSTERS

Friend and artist Pat Schulz reminded me about this program, one that will turn any jpeg photo image into a tiled version so you can download each panel as a pdf, print it in pieces and assemble the art as a larger photo or drawing. Great for enlarging images to use as patterns for art quilts.

AND finally, a TED talk from Sir Ken Robinson.


ON-LINE LIVE at last

The planning wall has finally come to life!

Well, almost. At any rate I am to the point of taking registrations of my test pilot group.
Here are the details (if you expressed interest before, you should have gotten an email today).

The test pilot group will be open to the first 25 participants who respond. I don't think I can handle more participants than that and still do a good job of facilitation with the level of participation I hope we have.

Dear Colleague:

You have expressed interest in being one of my "test pilots" for a new on-line teaching format and for an online workshop that I will facilitate. After a busy winter season teaching and learning I am ready to launch the workshop, with the start date for the first week of classes set for Thursday, April 1. The online workshop will last for 7 weeks (the last week is optional since it involves more expensive materials and equipment), but I would like this free trial to have participating artists who can commit to at least the next 6 weeks to work through the exercises, or, at the least give me feedback as to the format and content.

Here are the specifics of what I am offering with this course (it is a workshop-in-progress, with tweaking no doubt along the way!)
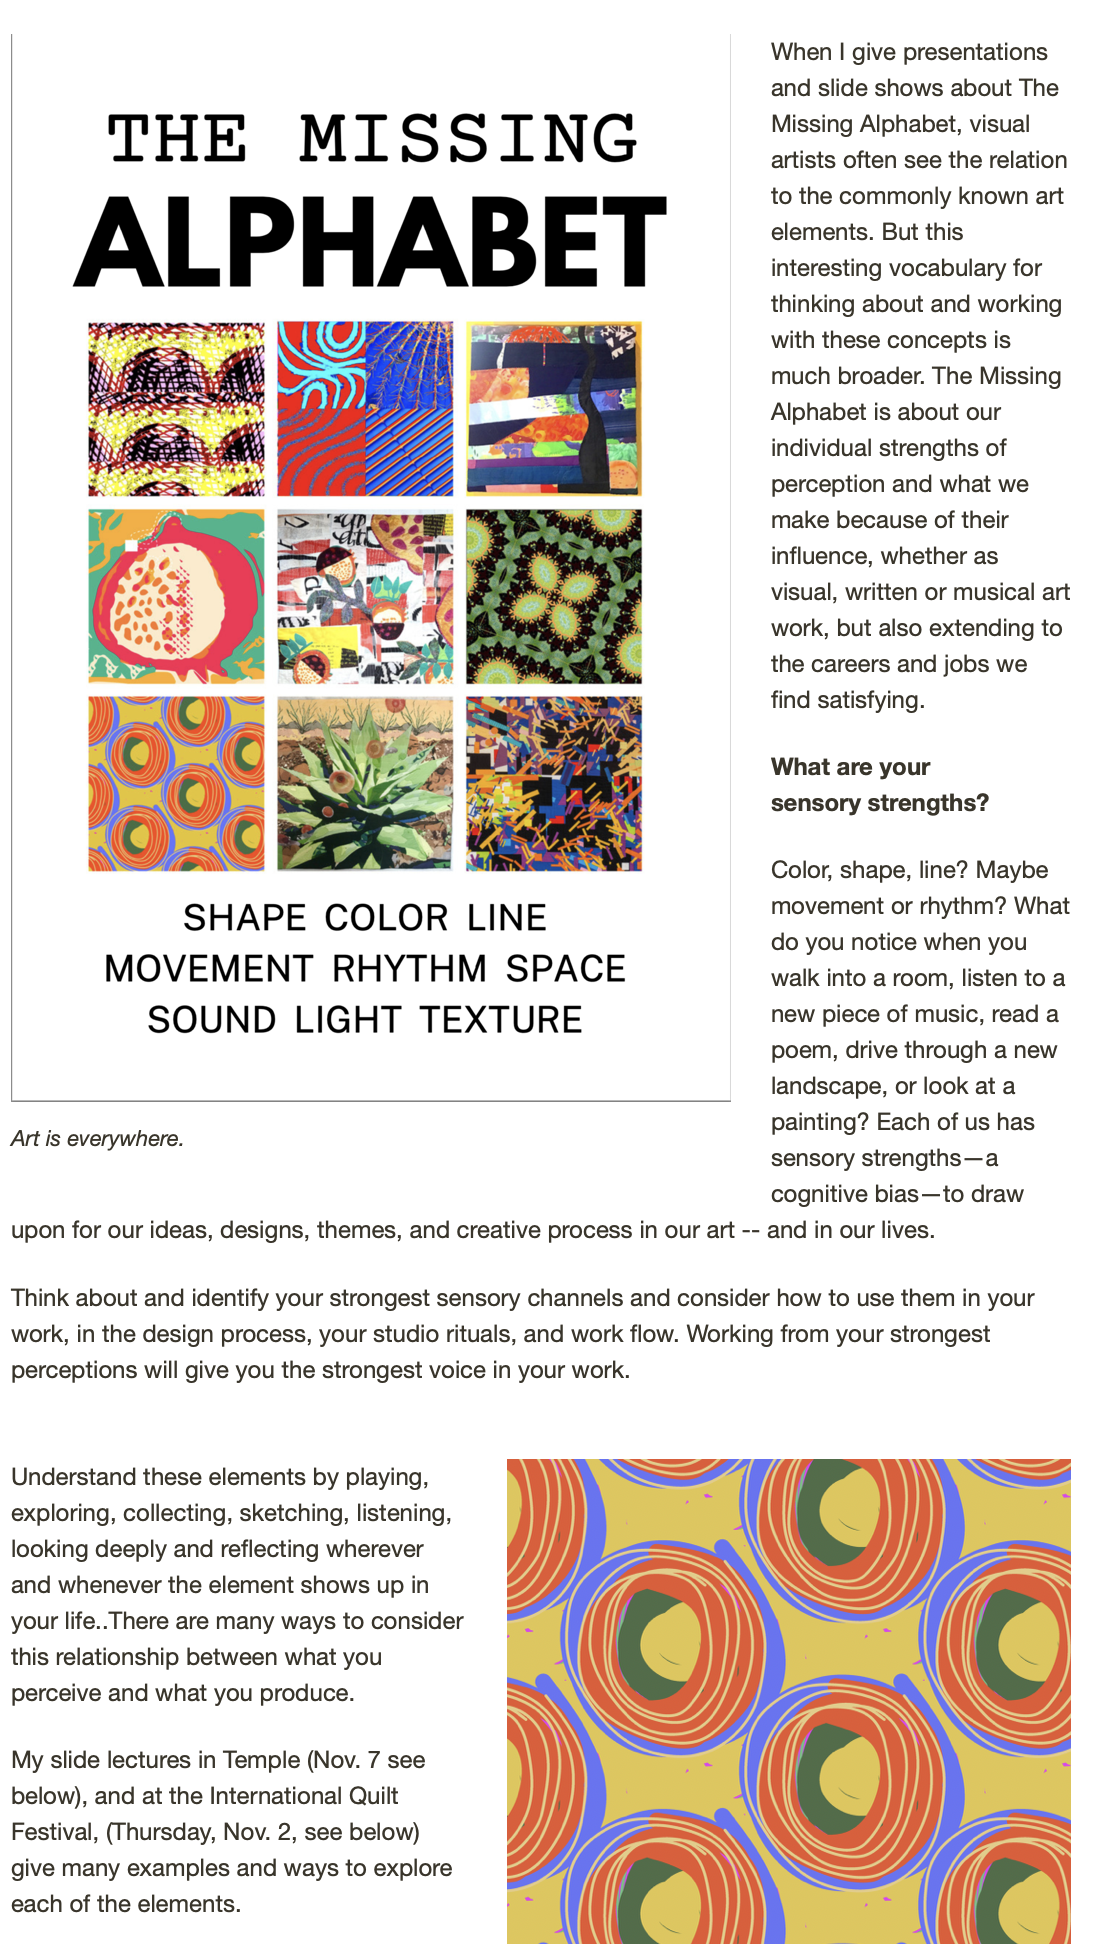
TEXT ON THE SURFACE

Week One -- Getting Started with Text on Textiles -- Ideas, inspirations, examples and collections to get going. Finding the right words for your personal stories, research and word-weaving. Fast forms to get your hands in motion and to start the ideas flowing. Supplies to gather, materials to look out for, prep to get you going, playtime in the studio and on the journal page. Writing exercises to continue throughout the course. (For specifics see my post two back in the archive)

Week Two -- Cut and Paste, Word Collages.
Week Three -- From Text to Textile.
Week Four -- Stamping out a Message
Week Five -- Write with the Sun -
Week Six -- Putting it all together.
Week Seven -- OPTIONAL -- Waxing Poetically


The online workshop will be offered on a private, password protected website with another password protected website that will be used for comments and discussion hosted on posterous.com. There will also be pdf downloads of lessons, supplies, etc. (It may take me a few weeks to get them formated for download). The workshop will be conducted through these two online web-based platforms. If you do not have highspeed internet service I suspect the process will be too tedious for you to use. In the future, perhaps I will also offer the workshop as a CD or DVD.

You will need to know (or be willing to learn) how to post comments on a website, send email to posterous, shoot and download photos into your computer of your work to share, attach photos to an email, search the web, set up bookmarks on your web browser. You will need a computer and printer/scanner if at all possible, and I reccommend that you have an all-in-one copier/printer though this is not essential. If you are accessing the workshop on a public computer, you must have the ability to log-in to password protected sites.

I am not, for this first trial, providing any supplies or material kits other than an option for you to order thermofax screens from me. Supply services may be added in the future.

As this is the FREE pilot launch for this course, those of you who commit to participating will help me improve as I learn more about how to make this powerful format work for all of us. In that light, I ask that you commit to the following:

PLEASE respect my ownership and copyright for these materials and use them for personal use only, not for distribution. Do not share your confidential password and log-in information with others. The password will be changed every three months, so if you wish to participate in comments or review the materials, be sure to do so within that time period.

Fully participate in group discussions, including posting examples of your work (photos), ideas, things you discover about the techniques and exercises, etc. Your comments and posts will be submitted via a separate but linked website on posterous.com. This means you simply will email photos, comments, etc to a dedicated, private website, accessible only to the members of this pilot course. Each lesson has a live link to the posterous site. I would like the option of using your submitted examples on future course websites and to illustrate exercises, and will credit your work with you name, if you wish. See the first assignment.

Stay the distance, at least through the next 6 weeks of lessons. I will post one lesson per week. Each lesson includes several assignments-- some design exercises as well as some technical “how-tos.” You can, of course, complete the assignments (or not) at your own pace and in your own good time, but discussions will track the course timeline and weekly lessons. I will also make all the written lessons available as pdf formated downloadable documents, so that you can keep them handy as you work and for future projects. At the end of each assignment, you’ll find a checklist that you can use to monitor your progress.

Participate in an evaluation at the end of the workshop so that I can improve and make the materials better and more useful.

VERY IMPORTANT!! Share your experience with others, so that when I offer the tuition-based version of the workshop, I have you as an ambassador to help me market the workshop online and to the groups that you participate in.

If this still sound like fun, please send me a prompt email return and I will mail you the registration information, password and links to the sites. Thanks for sharing the adventure!